My Camera Rig for Filming Chickens
How I Film My Chickens
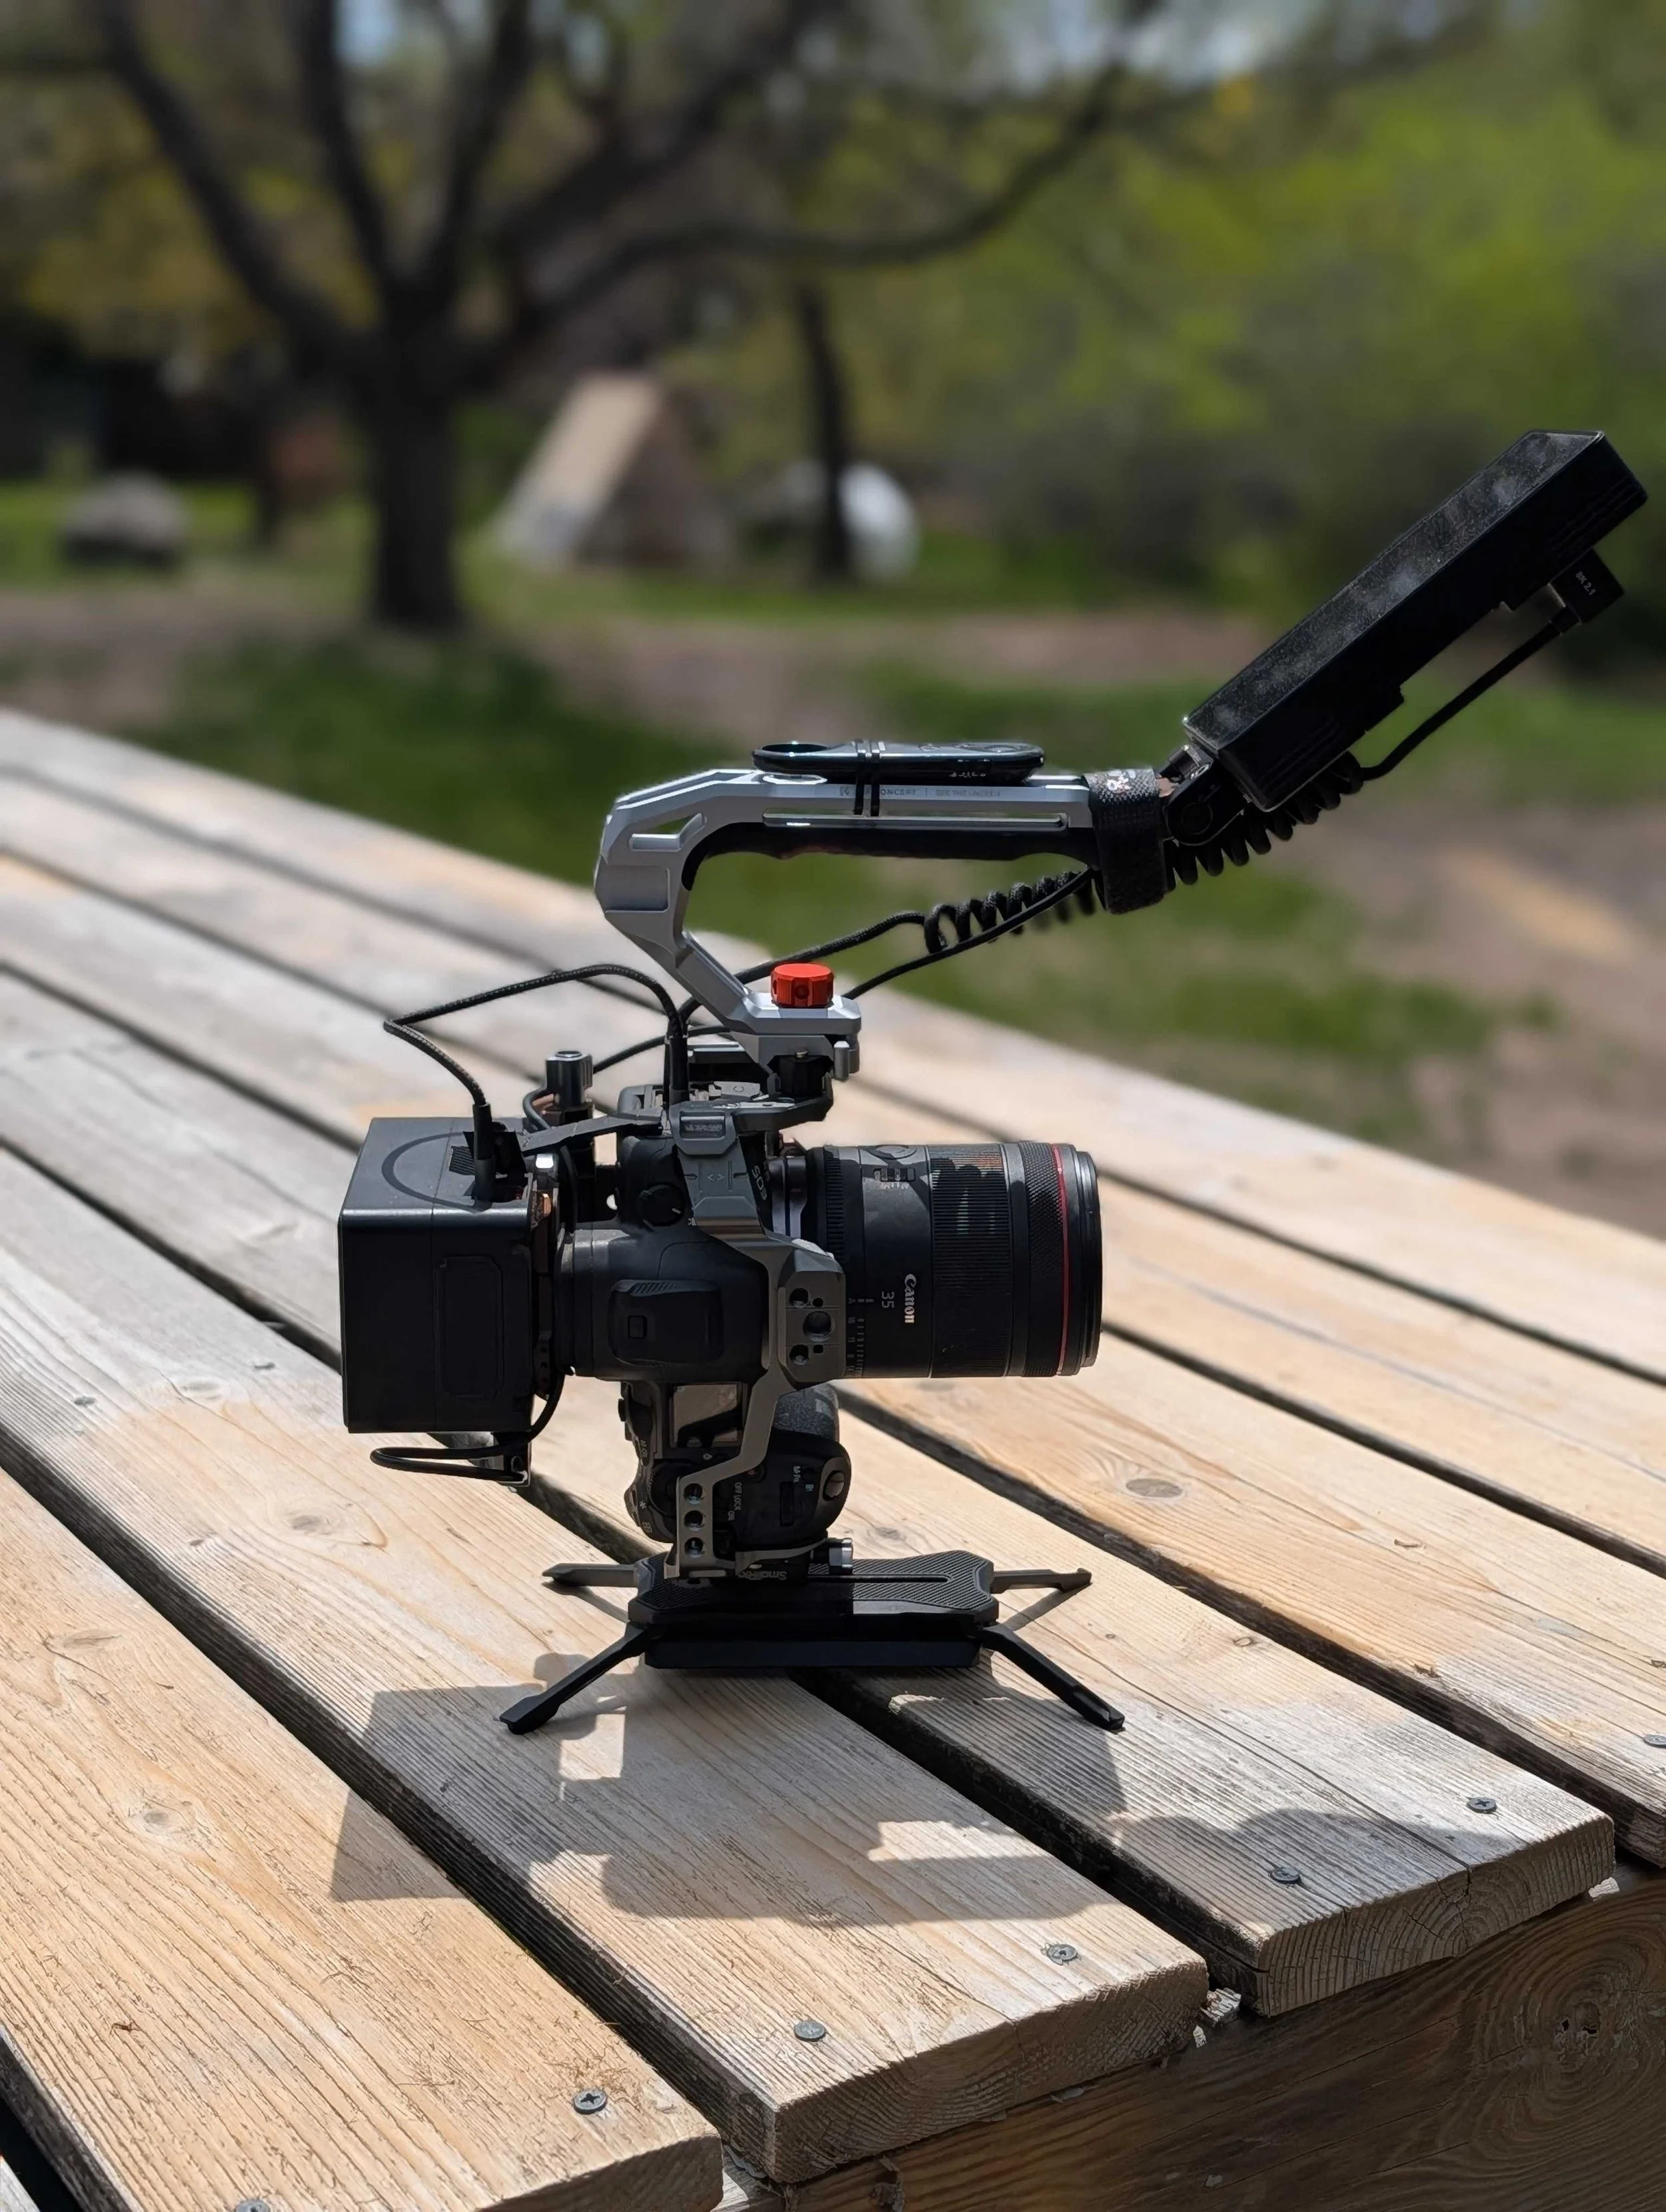
My primary camera rig for filming short-form chicken videos is a custom, vertical-optimized setup featuring the Canon R5 Mark II equipped with a Canon RF 35mm F1.4 VCM lens, all housed in a SmallRig aluminum cage. Weighted at about seven pounds to provide natural handheld stabilization, this configuration incorporates a vertically mounted Osee Lilmon 5 display monitor for framing low-angle shots, a wireless remote zip-tied directly to the handle for seamless control, and a mini V-mount battery to power the entire system. Whether you are looking to build this exact professional setup or want a budget-friendly alternative using a starter camera like the Canon R10, here is the complete, priority-sorted breakdown of every component required to capture steady, high-quality poultry content.
This camera rig looks a little fancy, but it is pretty simple; I’ve added various attachments and gone through countless top handles to get to where I am today. I focus on Vertical video for short-form content, while most camera rigs are designed to shoot Horizontal video. As you can see in the picture, I have everything optimized for vertical video. Heads up: some links below are affiliate links. If you buy through them, I earn a small commission at no extra cost to you; it's a free way to support the site, and I genuinely appreciate it.
The whole rig weighs about 7 pounds, and the heavier it is, the easier it is to hold steady
Camera Rig
Camera: Canon R5 Mark II - https://amzn.to/42vixKf
This is a higher-end camera, but the auto focus and quality are worth it; this camera will last you a very long time
Lens: Canon RF 35mm F 1.4 VCM Lens - https://amzn.to/4d7ho1C
This lens is amazing, perfect focal length for chickens, super smooth and quiet focus
Camera Cage: Smallrig Aluminum Cage - https://amzn.to/3QUImRD
This is important because it lets you attach all the accessories
Folding Feet: SmallRig Quick Release Plate - https://amzn.to/4dBSKq6
This is optional, but I really like it. I’m constantly setting my camera down between shoots. This lets me set it on the ground without having to worry
I use this little thing to attach the feet to the side of the cage: https://amzn.to/4u5HDLT
This is the rail you put on for the little thing to attach to: https://amzn.to/4u1Hk4N
Top Handle - https://amzn.to/3PlvFyL - $29.99
Display Monitor: Osee Lilmon 5 - https://amzn.to/4nyMB1h
This is optional, but it makes it much easier to frame your low angle shots
HDMI Cable: https://amzn.to/4nofYmV
Note this only works on the canon r5 mark ii, other cameras use Mini or Micro HDMI cables
Monitor Mount: https://amzn.to/4eC67rk
This lets you mount the monitor vertically
Neewer Mini V Mount Battery - https://amzn.to/4x8gFVR
This powers your camera and monitor
Battery Mount - https://amzn.to/42wV0st
This lets you attach the battery to the camera rig
Cable to Power Monitor - https://amzn.to/4u7FWNW
Canon BR-E1 Wireless Remote - https://amzn.to/4d3LbbA
I zip-tie this onto the top handle so I can start recording while holding the camera
Summary
Here are all the things broken down by priority
Starting:
Camera: Canon R5 Mark II - https://amzn.to/42vixKf
Lens: Canon RF 35mm F 1.4 VCM Lens - https://amzn.to/4d7ho1C
Camera Cage: Smallrig Aluminum Cage - https://amzn.to/3QUImRD
Advanced:
Folding Feet: SmallRig Quick Release Plate - https://amzn.to/4dBSKq6
Feet to rail clamp - https://amzn.to/4u5HDLT
Rail to attach clamp to for feet - https://amzn.to/4u1Hk4N
Top Handle - https://amzn.to/3PlvFyL
Display Monitor: Osee Lilmon 5 - https://amzn.to/4nyMB1h
HDMI Cable: https://amzn.to/4nofYmV
Monitor Mount: https://amzn.to/4eC67rk
Neewer Mini V Mount Battery - https://amzn.to/4x8gFVR
Battery Mount - https://amzn.to/42wV0st
Cable to Power Monitor - https://amzn.to/4u7FWNW
Things You Might Need
These are things I use that you might not have lying around
Short USB-C cable to power camera from battery: https://amzn.to/4tsPwtG
UV Resistant Zip Ties: https://amzn.to/48V3xcn (For attaching the remote to the top handle)
This setup is pretty darn spendy, so here is a lower-budget setup
Low Budget Setup
The Canon R10 with the kit lens is all you need to get started, and you can further upgrade it if you have a bigger budget
Canon R10 with 18-45mm lens - https://amzn.to/4uQbmIF - $1,149
Maximize R10 setup (Accessories $552.59, Lens $1,549)
Prioritize getting the lens if you want even better image quality, or prioritize the accessories if you’re having trouble getting steady footage.
Lens: Canon RF 35mm F 1.4 VCM Lens - https://amzn.to/4d7ho1C - 1,549.000
Canon R10 Cage: https://amzn.to/4tBCDNV - $39.99
Display Monitor: Osee Lilmon 5 - https://amzn.to/4nyMB1h - $169
HDMI Cable to Micro HDMI: https://amzn.to/4tZ2FLz - $13.72
Monitor Mount: https://amzn.to/4eC67rk $29.90
Neewer Mini V Mount Battery - https://amzn.to/4dF4Pe0 - $117
Battery Mount - https://amzn.to/42wV0st - $63.99
Cable to Power Monitor - https://amzn.to/4u7FWNW - $15.99
Top Handle - https://amzn.to/3PlvFyL - $29.99
Quick Release Nato Safety Rail - https://amzn.to/4wyvi4D - $13